
スマホを使い、ルートを Google マップのナビで走る
ツーリングやドライブの当日に、RouteCross のルートの地点を、スマホの Google マップのナビで 1 つずつたどる方法です。
更新日: 2026-10-25
RouteCross のルートは、スマホでも見られます。ツーリングやドライブの当日は、ルートの地点を 1 つずつ Google マップのナビで目指していくと、ルートに沿って走れます。
以下の画面は、Android のスマホ(Chrome と Google マップのアプリ)で撮影したものです。画面の表記は、更新で変わることがあります。
地点を Google マップで開くには、RouteCross へのログインが必要です(Google または Microsoft のアカウント)。走り始める前に、ログインしておいてください。
安全に楽しむために
- 走りながら、スマホやナビを操作しないでください。 次の地点を開くのは、安全な場所に止まってからにします。
- 知らない道では、特に気をつけてください。 ルートは参考です。道路の状況は変わるので、標識や現地の様子を優先してください。
- ツーリング中のヤエー(ライダー同士の手振り)は、余裕のあるときだけで大丈夫です。 無理に手を離さず、運転を優先してください。
1. ルートを選ぶ
「検索する」を開き、走りたいルートを探します。地図でルートの線や始点を押すと、ルート名と距離が出ます。「詳細を見る →」を押すと、ルート詳細が開きます。地図の下の一覧から開くこともできます。
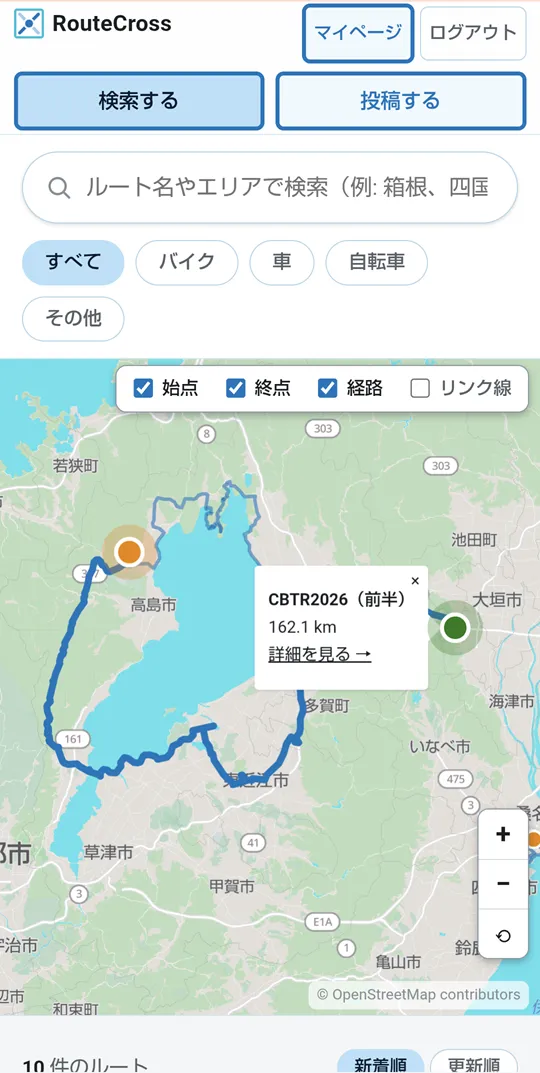
図 1: 地図でルートを選んだところ
2. 次の地点を Google マップで開く
ルート詳細の地図には、立ち寄り地点が番号付きのピンで、始点が S、終点が E で出ます。
次に向かう地点のピンを押すと、メニューが出ます。「Google Map で見る」を押します。
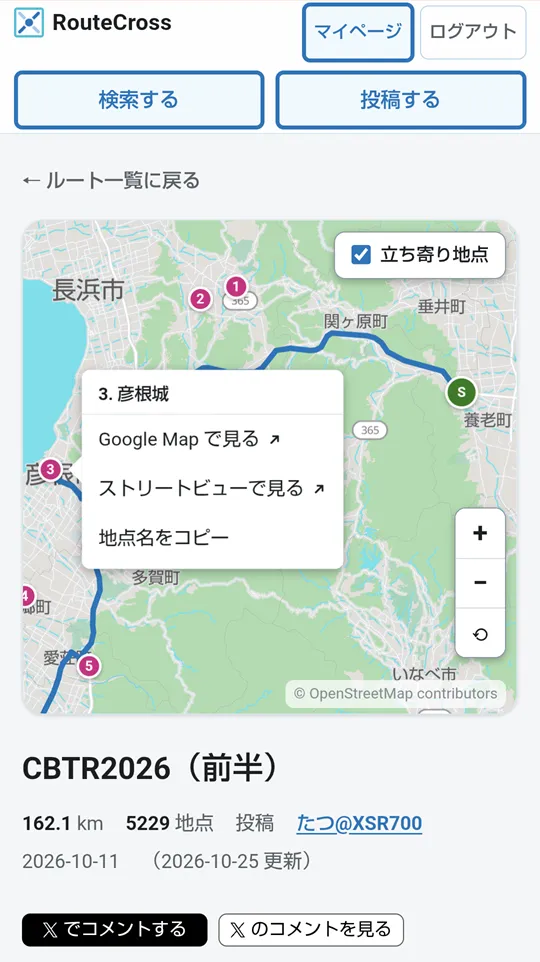
図 2: 地点のピンを押したときのメニュー
- ピンが押しにくいときは、地図を拡大してください。
- 「ストリートビューで見る」で、着く前に、地点のまわりの様子を確かめられます。
3. Google マップのナビで走る
Google マップのアプリが開き、地点に印が付きます。「ナビ開始」を押すと、その地点までの案内が始まります。
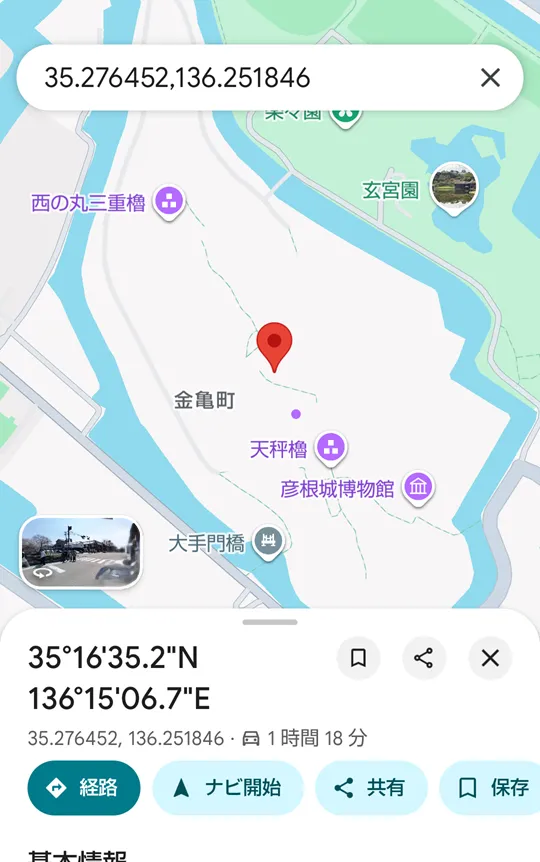
図 3: Google マップで地点を開いたところ
出典: Google Maps(Google マップのアプリの画面)。地図データの著作権は、Google および各データ提供元に帰属します。
- 上の検索欄には、地点の名前ではなく緯度・経度が出ますが、場所は合っています。
- 「経路」を押すと、走る前に道順を確かめられます。
4. 着いたら、次の地点へ
地点に着いたら、スマホの「戻る」や、アプリの切り替えで、ブラウザの RouteCross に戻ります。ルート詳細の地図は、前に見ていた位置と拡大のまま出ます(24 時間まで覚えています)。
次の番号の地点を押し、手順 2・3 を繰り返します。終点(E)まで、これを続けます。
ルート全体を Google マップで開く
ルート詳細の下にある「Google Map で経路を開く」を押すと、始点から終点までの経路を、まとめて Google マップで開けます(ログインは要りません)。
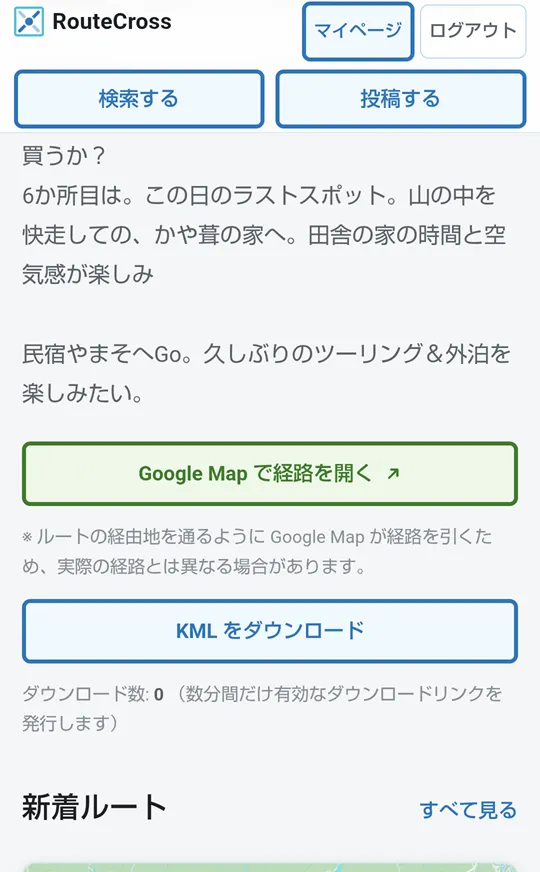
図 4: 「Google Map で経路を開く」のボタン
ただし、Google マップがルートの経由地を通るように道を選び直すため、投稿されたルートとは違う道になることがあります。投稿者が選んだ道をたどりたいときは、地点ごとに開く方法(手順 2〜4)がおすすめです。
Ride a route with Google Maps navigation on your phone
How to follow the points of a RouteCross route one by one with Google Maps navigation on your phone, on the day of your ride or drive.
Last updated: 2026-10-25
You can view RouteCross routes on your phone, too. On the day of your ride or drive, head for the points of the route one at a time with Google Maps navigation, and you will follow the route.
The screens below were taken on an Android phone (Chrome and the Google Maps app). The Google Maps screen is in Japanese. Wording on the screen may change with updates.
To open a point in Google Maps, you need to log in to RouteCross (with a Google or Microsoft account). Log in before you set off.
Ride safely and enjoy
- Do not use your phone or navigation while riding or driving. Open the next point only after you have stopped in a safe place.
- Take extra care on roads you do not know. A route is only a guide. Road conditions change, so follow road signs and what you see on site.
- Wave to other riders only when you have room to do so. Riders in Japan often wave to each other (they call it “yaeh”), but keep your hands on the bars when you need them, and put riding first.
1. Choose a route
Open Search and find a route you want to ride. Tap a route’s line or start point on the map to see its name and distance. Tap “View details →” to open the route details. You can also open it from the list below the map.
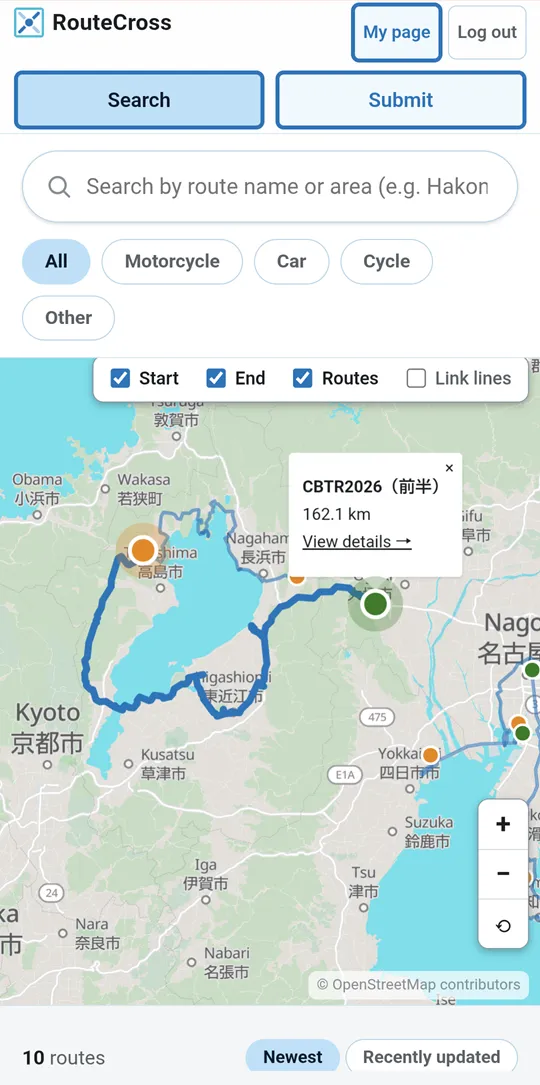
Figure 1: A route chosen on the map
2. Open the next point in Google Maps
On the route details map, stops appear as numbered pins, the start as S and the end as E.
Tap the pin of the point you are heading for next to open a menu. Tap “View in Google Maps”.
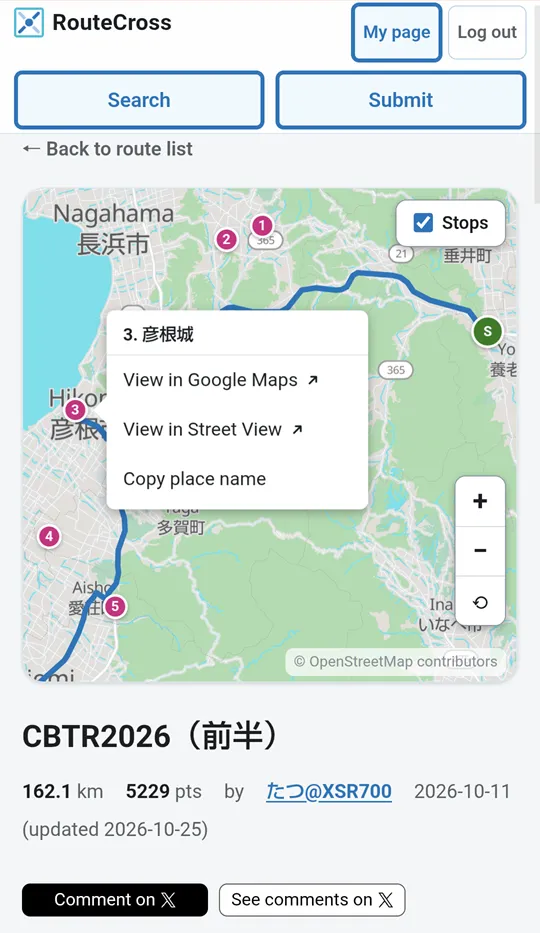
Figure 2: The menu that opens when you tap a pin
- If a pin is hard to tap, zoom in on the map.
- “View in Street View” lets you check the surroundings of a point before you get there.
3. Ride with Google Maps navigation
The Google Maps app opens with a marker on the point. Tap “Start” to begin navigation to the point.
Figure 3: A point opened in Google Maps
Source: Google Maps (screen of the Google Maps app). Map data copyright belongs to Google and its data providers.
- The search box at the top shows latitude and longitude instead of the name of the point, but the place is correct.
- Tap “Directions” to check the way before you set off.
4. When you arrive, go on to the next point
When you reach the point, go back to RouteCross in your browser with your phone’s back button or by switching apps. The route details map opens at the same position and zoom as before (it is remembered for up to 24 hours).
Tap the next numbered point and repeat steps 2 and 3. Keep going until you reach the end (E).
Open the whole route in Google Maps
Tap “Open route in Google Maps” at the bottom of the route details to open the way from the start to the end in Google Maps in one go (no login needed).
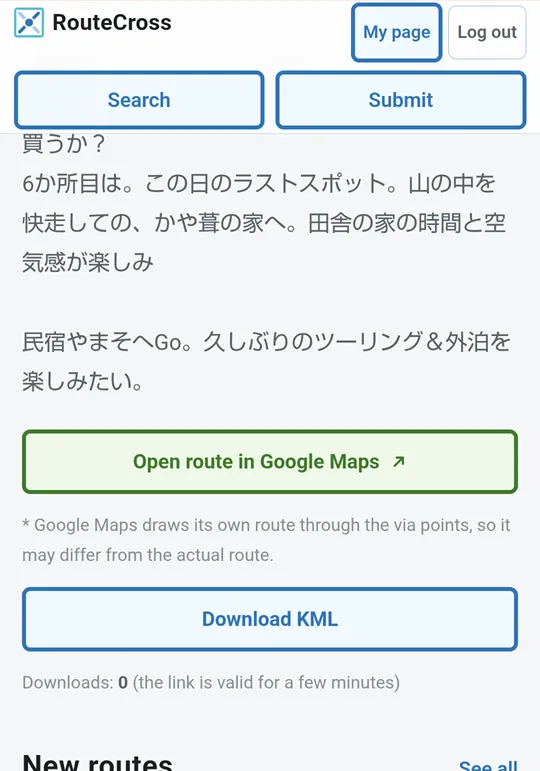
Figure 4: The “Open route in Google Maps” button
Google Maps picks its own roads through the route’s via points, so it may take different roads from the posted route. To follow the roads the poster chose, open the points one by one (steps 2 to 4).